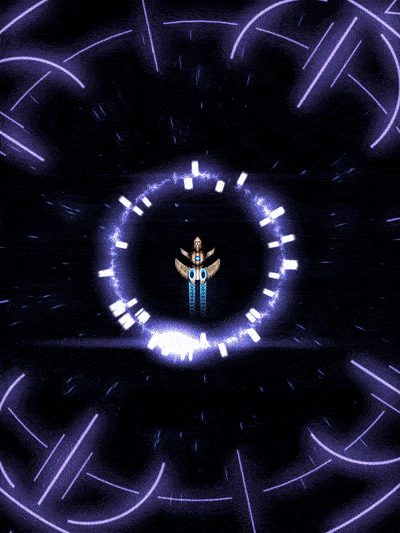
Zens
Phoenix II —FAQ (IOS)

BOOKMARK
FAQ (IOS) by light_rock_zz
Version: 5.3 | Updated: 07/29/2025
FAQ of the Month Winner: January 2020 | Highest Rated Guide
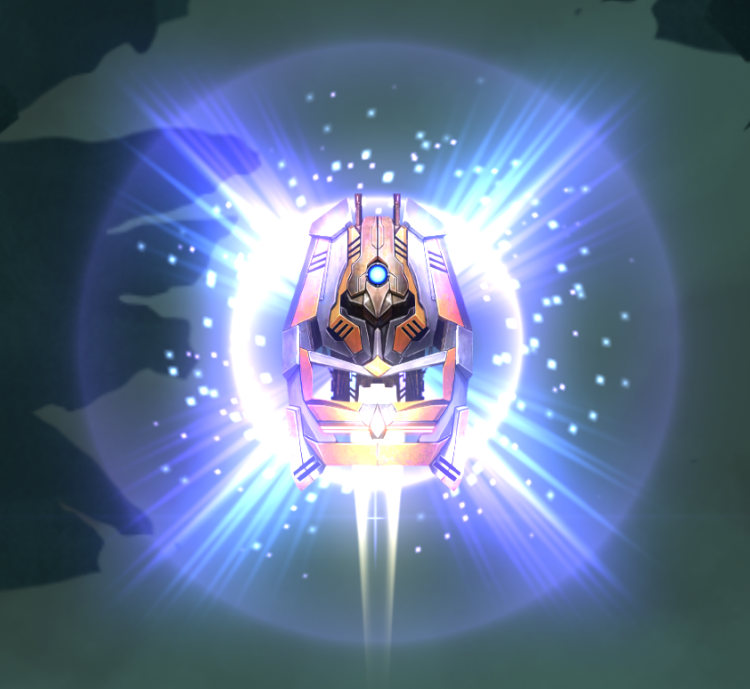
Ships
Zens
| General Zen strategies as upgrades progress | |||||||||
|---|---|---|---|---|---|---|---|---|---|
This section discusses how each Zen evolves as their upgrades go, how upgrading them would help you, as well as detailed strategies to use them to maximum effect.
A Zen's Time to recover 1 charge ![]() is the time taken for (Charge Time
is the time taken for (Charge Time ![]() + 1 × Charge Time Increase
+ 1 × Charge Time Increase ![]() ) to decrease back to (Charge Time
) to decrease back to (Charge Time ![]() ) after using it once, and not allowing the Zen to charge again afterwards.
) after using it once, and not allowing the Zen to charge again afterwards.
- The recovery only starts once your main weapon
 starts firing again, rather than at the point the Zen is allowed to effect.
 - The recovery is linear (decreases at a constant rate), as implied by its icon.
- If you see your entire ship flash light blue (similar to an activated warp gate) and hear a high pitch sound, it means that the Zen has fully recovered and the Zen's charging time is back to Charge Time
 .
. - Only Kappa Drive
 doesn't have this statistic because using it incurs no Charge Time Increase
  .
.
Kappa Drive
Attract power particles to your ship
| Upgrade Lvl | Attraction Power (Active) | Attraction Power (Passive) | Generator Efficiency (Aura Energy gained per sec) |
|---|---|---|---|
| 1 | ×7 | ×1 | 7 |
| 2 | ×9 | 8 | |
| 3 | ×11 | 9 | |
| 4 | ×13 | 10 | |
| 5 | ×15 | ×2 | 11 |
| Ultimate (6) |
| Ultimate | Description | Details |
|---|---|---|
| Kappa Overdrive | Increases attraction power and slows down time. | Slows down time by 50% (half the normal game speed, like playing a YouTube video at ×0.5 speed) when Kappa Drive is active |
Useful Levels: 1, Ultimate
Brief Summary: More useful on radius based Auras than counter based Auras since any amount of using Kappa Drive will almost always help. A very useful dodging tool, thus highly recommended for beginner players. Even helps pros in the toughest missions. Best abused on a bigger screen.
As you upgrade Kappa Drive, you just get better Aura ![]() usage out of an improved Kappa Drive.
usage out of an improved Kappa Drive.
Strategies
- Kappa Drive should be always used between wave and Act transitions, unless you are already at full Aura
 capacity.
 - Obviously, Kappa Drive should be used if your Aura is running low, which means either a small radius
 , or you are left with 1 or 2 counters
  .
. - Kappa Drive only serves to enhance the Aura , so the actual usefulness of Kappa Drive depends more of the Aura than Kappa Drive itself.
- It can be both offensive and defensive.
- It can serve to improve survivability or speedrunning capabilities.
- Bear in mind Kappa Drive disrupts many main weapons , unless they are of the Uninterruptible Burst weapon class.
- Kappa Drive usage during waves should be regulated according to the ship's main weapon class.
- A less known fact is that all ships equipped with Kappa Drive have a more powerful passive particle attraction.
- This means that even without Kappa Drive active, you are pulling in particles faster than a non-Kappa Drive ship.
- When upgraded to Ultimate
 , the utility of Kappa Drive is increased greatly.
- The slowdown in time allows for the technique known as Kappa Dodge.
- This technique allows to dodge between the tiniest of gaps between bullets, which are normally nearly not humanly possible due to the speed of this game.
- Primary purpose of this technique is for survival. However, because Kappa Drive generates and attract particles and allows you to be in close proximity to bullets for grazing, you can gain quite a lot of Aura .
- The movement of bullets, especially boomerangs
 , makes dodging difficult under normal circumstances since there are so many bullets moving in many different directions.
 - The time slowdown also allows you to make decisions better.
- This gives Kappa Drive an additional defensive aspect. The video below shows how useful the Kappa Dodge technique is:
- The other advantage of having a slowed time is the ability to safely graze many bullets.
- This severely enhances defensive radius based Auras since you can quickly generate a usable Aura radius after using it again.
- It also helps offensive radius based Auras since they can be launched quicker and disposed off quickly to deal more damage.
- Kappa Drive must be used pre-emptively and abused to kill quickly.
- Kappa Drive helps counter based Auras , but not as much since it takes a longer time for the effects of Kappa Drive to be realized.
- This severely enhances defensive radius
- Kappa Drive regulation is very important in very dense waves.
- It should be used in very small bursts in order to pull in just enough particles to keep a healthy Aura radius , or enough to fill counters almost to the max (one less than the max).
- Overabusing Kappa Drive in dense waves will result in particle shortage later on.
- For offensive based Auras , be sure to know its disposal time.
- Some Auras such as Missile Swarm
 and Laser Storm
  take longer to dispose compared to Vorpal Lance
  or Goliath Missile
  , so progressively pull in particles as your Aura is being disposed of (instead of simply letting it run from the start).
- Some Auras
- It should be used in very small bursts in order to pull in just enough particles to keep a healthy Aura
Mega Laser

Charges a giant laser
| Upgrade Lvl | Damage | Charge Time | Charge Time Increase | Time to recover 1 charge |
|---|---|---|---|---|
| 1 | 150 | 2.3s | +0.5s | 4s (−0.125s per sec) |
| 2 | 155 | 2.2s | ||
| 3 | 160 | 2.1s | ||
| 4 | 165 | 2.0s | ||
| 5 | 170 | 1.9s | ||
| Ultimate (6) |
| Ultimate | Description | Details |
|---|---|---|
| Beam Width | Increases beam width. | Increases the width of Mega Laser from 30 to 45. |
Useful Levels: 1, Approximately 4-Ultimate
Brief Summary: Quite a straightforward offensive Zen. Positioning is key. Recommended for intermediate players and upwards. Most effective against thick columns of small Invaders or big Invaders.
Upgrades
- Level 1 Mega Laser is the most sluggish offence in this game, and is only really usable either between Act transitions, or during wave transitions where the next wave has a frontline Vulture
 .
. - Otherwise, it has no defensive aspect at all and only serves as an offensive tool that can make certain waves easier.
- As you upgrade Mega Laser, it becomes more and more responsive and it becomes possible to charge it between wave transitions with Level 3 or 4 and above.
Strategies
- Mega Laser has the following stats:
- Fired at a vertical distance of 30 above ship core
- Slows game speed to ×0.5, which lasts for a real-time of 0.4s
- Duration of Mega Laser = 0.5s (without taking into account time slowdown)
- Mega Laser is a great step to learning speedrunning and the basics of important positioning.
- The Charge Time forces you to be careful where you position yourself at.
- Wrong positioning can lead to dying.
- However, there is leniency in Mega Laser since it clears bullets ahead once fired.
- With the Ultimate , it has slightly more leniency.
- With the Ultimate
- It does not matter at what vertical height of the field you start charging Mega Laser.
- Only your horizontal position matters.
- This means Mega Laser is almost always charged at the bottom of the screen.
- The Charge Time
- As a general rule, charge Mega Laser whenever you can between wave or Act transitions.
- There are also rare cases where Mega Laser can also be charged mid-wave, especially for heavy waves or against Condors
 and Rocs
  .
. - It is likely because there are no dart tracking turrets or boomerangs around, or you are facing a Condor or Roc that is very upfield.
- It is usually possible to abuse Mega Laser in Shuriken/MIRV missions, more than once per wave.
- Charging Mega Laser between dart/pellet lanes is a very useful skill for speedrunning.
- Dealing with dart/pellet lanes of a T4 spinner is very dangerous, but highly rewarding if done correctly.
- There are also rare cases where Mega Laser can also be charged mid-wave, especially for heavy waves or against Condors
- Mega Laser has good bullet clearing capabilities which can be relied on a fair bit.
- Bear in mind it's usually only a 1 or 2 time use.
- Particularly, it is helpful since you can ride up Mega Laser, meaning you move upfield together with Mega Laser.
- This allows you to collect particles from destroyed Invaders and those left behind in the previous wave.
- It benefits both offensive and defensive Auras equally.
- It may be useful when bullets are approaching from the sides since you can escape them.
- Note that there is a tiny gap between the start of Mega Laser itself and your ship's core.
- This means that there is a small chance that a bullet in front will not be eliminated after firing Mega Laser.
- If you see a bullet too close for comfort after firing Mega Laser, pull back quickly to avoid death.
- The problem with Mega Laser is the very fact that the horizontal position matters.
- With such a long Charge Time , many small Invaders may potentially escape Mega Laser.
- It is important to understand the layout of the waves you charge Mega Laser on, and position according to the initial formation.
- For example, if the right side column is tall, align yourself with the right side column.
- Generally, going into a wave with no prior knowledge, offset slightly to one side from the vertical centerline, and adjust from there.
- If aiming at the middle column, it is better to slightly offset to the left or right, usually somewhere close to the 1/4 or 3/4 margin.
- This allows you to have a higher chance to catch Invaders from 2 columns instead of one.
- This offset is unnecessary if a Vulture is behind everything since it will soak up the spillover damage.
- With 2 Eagles
 at the back, the offset is still helpful, especially if they choose to split apart.
 - With large Invaders on field, Mega Laser is bound to deal devastating damage since they soak up everything and there is no damage spill.
- With such a long Charge Time
- When speedrunning, in Acts 1-3, it is usually beneficial to release Mega Laser a bit earlier than when Invaders fully arrive on field to quickly re-position yourself to the opposite side to take out the remaining Invaders.
- Even for one Eagle , you can slightly pre-fire Mega Laser to destroy it, unless there are Ravens
 behind it.
 - The less health Invaders of the first wave of the next Act have, the earlier you can simply Fire and Forget.
- Even for one Eagle
- You can also charge Mega Laser close to the left/right side of the screen.
- This punches a hole in Invader frontlines to deal with threats behind.
- With a Vulture or 4 Eagles in front blocking the way, Mega Laser is not enough to plow through to reach potentially troublesome Invaders upfield.
- In such cases, it may be beneficial to charge upfield, above the rest of the Invaders to reach the Vulture behind to kill it first, especially if it has very dangerous turrets that fire quickly.
- You can use this to get rid of very dangerous turrets on Condors or Rocs if desperate, but this is an extremely risky move that should only be considered for ships with an offensive Aura .
- In such cases, it may be beneficial to charge upfield, above the rest of the Invaders to reach the Vulture
- In very dense or heavy waves, it no longer matters where you charge Mega Laser.
- If it's against armored
 Invaders, try to aim straight on to one column of Invaders so that there is a better chance to hit the cockpit of Invaders.
- If it's against armored
- In light waves, there is no point to charge an Mega Laser unless it's the start of a new Act.
- In speedrunning, it may be a bad idea to charge at the start of a new Act if Wave 1 is too light, since that might waste time charging Mega Laser with an increased charge time on other waves in that Act.
- Skip charging Mega Laser and use your main weapon and Aura to eliminate the first wave of the new Act if so.
- Because Mega Laser's Charge Time is long, it is a useful burst reset tool for ships with main weapons of Uninterruptible Burst or Interruptible Burst weapon class.
- You can fake charge Mega Laser between waves.
- Cancel Mega Laser to make the main weapon fire immediately.
- For Uninterruptible Burst main weapons , the full burst goes off, so you don't waste the initial part of the burst.
- For Interruptible Burst main weapons , the same also applies.
- It is useful if you don't need the full burst to eliminate the current wave so you can waste a bit of the burst.
- Then, the next burst comes out faster in the next wave.
- For Uninterruptible Burst main weapons
Mega Bomb

Charges a giant bomb
| Upgrade Lvl | Damage | Radius | Charge Time | Charge Time Increase | Time to recover 1 charge |
|---|---|---|---|---|---|
| 1 | 30 | 300 | 2.0s | +0.4s | 4s (−0.1s per sec) |
| 2 | 325 | ||||
| 3 | 350 | ||||
| 4 | 375 | ||||
| 5 | 400 | ||||
| Ultimate (6) |
| Ultimate | Description | Details |
|---|---|---|
| Fusion Core | Deals additional damage at the center of the blast. | Adds a Fusion Core |
Useful Levels: 1, Ultimate
Brief Summary: High skill offensive Zen. Wipes out crowds with relative ease (or with absolute ease in the case of Unprotected
Invaders). The long Charge Time and no bullet clearing capabilities mean that Mega Bomb can be hard to pull off quite often, thus it is not for the intermediate and below skill players.
Upgrades
- The only change in Mega Bomb as you upgrade it is the increase in radius .
- Thus, there is not much change in gameplay from a level 1 Mega Bomb to a level 5 Mega Bomb.
- Due to its long Charge Time at all levels and having no bullet clearing capabilities (Discounting the EMP Core apex), Mega Bomb is a difficult Zen
 to use that heavily emphasizes risk taking.
 - You must also decide when firing your main weapon / Aura might be more beneficial instead.
- Generally, if there are only Eagles or larger on field, it might be a better idea to cancel if Mega Bomb still has more than 1s left to charge finish.
- Due to its inability to clear bullets, it is extremely risky to charge Mega Bomb without being downfield.
- There are many exceptions however, such as your ship having a defensive Aura to aid your exit from Mega Bomb, or Invaders having no dart tracking turrets to shoot you at point blank.
- There are many exceptions however, such as your ship having a defensive Aura
- Mega Bomb is almost always charged between wave or Act transitions.
Strategies
- Mega Bomb has the following stats:
- Blast expands from the spot of a vertical height of 90 above ship core
- Game slows to a speed of ×0.4
- When Ultimate , the risk vs reward factor becomes more apparent, and there is more reward to charge Mega Bomb upfield.
- Not all Mega Bomb ships are able to utilize this Ultimate properly however.
- Not all Mega Bomb ships are able to utilize this Ultimate
- Mega Bomb requires prior knowledge of every wave so as to land Fusion Core
 at the most appropriate place.
- Usually, this would be between 2 of the largest Invaders, which is usually between 2 Herons
 / Eagles , or a Vulture .
- However, sometimes this is not possible. for example, it may not be possible to land Fusion Core between 2 Herons which also have other Ravens in-between due to turret collision.
- The long Charge Time of Mega Bomb, especially for speedrunning ships may have additional charge time incurred from previous waves, which necessitate the charging of Mega Bomb in strange but reliable spots to pull it off.
- This comes with grinding and experience.
- However, sometimes this is not possible. for example, it may not be possible to land Fusion Core
- Landing Fusion Core on a group of Shielded
 / Armored Ravens is possible, and can make a huge difference in speedrunning since you chase down less Ravens to hit with your main weapon .
- Unprotected Ravens die instantly from the Mega Bomb explosion itself so there is no need to land Fusion Core on them.
- Unprotected
- Usually, this would be between 2 of the largest Invaders, which is usually between 2 Herons
- It is important to note that the epicenter of Mega Bomb is based on the center of the Fusion Core , and not where your ship core is.
- The AoE is thus dependent on the position of the Fusion Core .
- The AoE is thus dependent on the position of the Fusion Core
- Mega Bomb is always pulled off once per wave, since there is simply no point to pull it off a second time due to the Charge Time Increase .
- Almost all smaller Invaders will be dead, leaving the larger ones remaining.
- Mega Bomb is better left to cool down since using 2 Mega Bombs in a row mean the current wave will get wiped out too fast
- The next wave which will almost always be more beneficial to charge Mega Bomb may no longer have the chance to pull off Mega Bomb due to the Charge Time Increase .
- The next wave which will almost always be more beneficial to charge Mega Bomb may no longer have the chance to pull off Mega Bomb due to the Charge Time Increase
- Very effective against dense waves, obviously.
- However, the inability to kill off most Invader-classes and Invader affinities can limit Mega Bomb's usefulness.
- Particularly, Shielded / Armored Ravens hiding behind Eagles or larger will prove a problem as they cannot be destroyed instantly and still cause trouble.
- In such cases, it may be more advantageous to charge Mega Bomb all the way upfield and land Fusion Core on these pesky Ravens or Herons , and proceed to use your main weapon to eliminate the rest of them upfield before heading back down to deal with the rest in front.
- Shielded Ravens are particularly problematic since they will regenerate their shield after Mega Bomb if you leave them alone, decreasing the usefulness of Mega Bomb.
- With Armored Ravens , chasing them down is just a pain.
- In such cases, it may be more advantageous to charge Mega Bomb all the way upfield and land Fusion Core
- Particularly, Shielded
- However, the inability to kill off most Invader-classes and Invader affinities can limit Mega Bomb's usefulness.
- It may be a good idea to let Mega Bomb stay charged for a while, and wait for more optimal lineups such that Fusion Core will land on more Herons or more Eagles .
- A good guide is to wait for a maximum of 2s.
- It is usually a good idea to use Mega Bomb at Wave 1 and Wave 4 of every Act.
- Wave 4 is usually dense or heavy, which makes it a good idea to use Mega Bomb.
- The Act transition allows for enough time to set off an Mega Bomb on Wave 1 of the next Act.
- However, adjust where you need to.
- For example, if Wave 2 is a dense wave, but Wave 1 is very light, skip Mega Bomb charging in the Act transition.
- Similarly, if Wave 4 is a very light wave, then skip Mega Bomb on Wave 4.
- In some cases, charging Mega Bomb upfield or at around the center of the field may not be worth it, as this might result in particle overflow, which wasting particles for offensive Auras .
- If there are clearly a lot of particles upfield, it is likely more worthwhile to charge more downfield to avoid particle overflow, and sacrifice Fusion Core damage.
- If there are clearly a lot of particles upfield, it is likely more worthwhile to charge more downfield to avoid particle overflow, and sacrifice Fusion Core
- Because Mega Bomb has a long Charge Time , it is a useful burst reset tool, for ships with main weapons of Uninterruptible Burst or Interruptible Burst weapon class.
- Fake charge Mega Bomb between waves if Mega Bomb is unable to finish charging.
- Cancel Mega Bomb and the main weapon fires straight away.
- For Uninterruptible Burst main weapons , the full burst goes off, so you don't waste the initial part of the burst.
- For Interruptible Burst main weapons , the same also applies.
- It is also useful if you don't need the full burst to eliminate the current wave so you can waste a bit of the burst.
- Then, the next burst comes out faster in the next wave.
- For Uninterruptible Burst main weapons
Teleport

Teleport to any location
| Upgrade Lvl | Charge Time | Charge Time Increase | Time to recover 1 charge | Fully Charged Duration in real time (Before Teleport cancels) |
|---|---|---|---|---|
| 1 | 0.8s | +0.6s | 3s (−0.2s per sec) | 5s |
| 2 | 0.7s | +0.5s | 3s (−0.167s per sec) | |
| 3 | 0.6s | +0.4s | 3s (−0.133s per sec) | 6s |
| 4 | 0.5s | +0.3s | 3s (−0.1s per sec) | |
| 5 | 0.4s | +0.2s | 3s (−0.067s per sec) | 7s |
| Ultimate (6) |
| Ultimate | Description | Details |
|---|---|---|
| Arrival EMP | Clears the teleport destination of enemy bullets. | Produces a small Bullet EMP with a radius |
Useful Levels: 1, Ultimate
Brief Summary: Not an easy Zen to use. Best desperate escape for beginner players. Fast cooldown means it is abusable and easy to use, but it is easy to over-abuse it.
Upgrades
- A level 1 Teleport can still be useful.
- You need to be skilled to pull it off as you need a lot of pre-emption to successfully charge a Teleport.
- Being able to get yourself out from a massive barrage of bullets simply by Teleport-ing away is very useful and life-saving in many circumstances, especially when faced with a thick cloud of shurikens.
- As you upgrade Teleport, it becomes more and more responsive, thus being much easier to use.
- Without the Ultimate upgrade, find for the cleanest spot (with the least bullets around) to Teleport to.
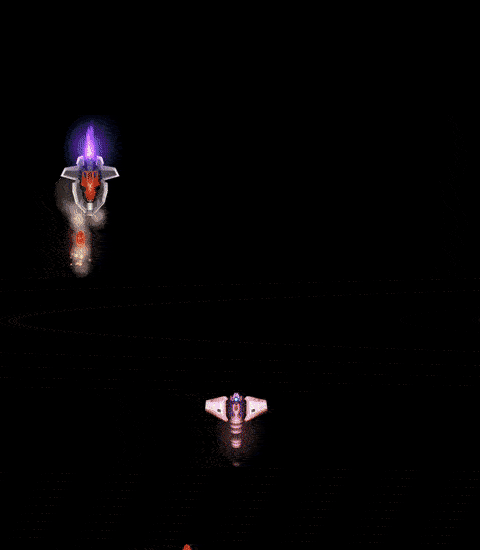
If you don't have an Ultimate Level Teleport, you can try something fun called "Implosive Grazing" where you teleport right into the spot the MIRV
 exploded after the MIRV has exploded (because you can die by the MIRV itself). Bear in mind it only works if it is a lone MIRV. This technique is shown below:
Strategies
- Not always easy to get into.
- For a beginnner, even a sufficiently leveled Teleport may be an issue.
- Despite the fast Charge Time , many beginners forget there is still a non-negligible Charge Time, which requires some degree of pre-emption.
- Not pre-empting when to Teleport may result in darts or boomerangs still killing you due to their speed.
- A great tactic to learn Teleport is to pre-charge it as early as possible, even if there is the slightest chance of getting threatened.
- This allows you to drastically slow time by 90% (10% of original gameplay speed), allowing you to carefully decide where to Teleport to.
- Bear in mind you only have 7 seconds in real time to decide where to Teleport to.
- Allowing Teleport to cancel does not increase its Charge Time .
- Allowing Teleport to cancel does not increase its Charge Time
- As you get better at using Teleport, the amount of pre-emption needed becomes lesser.
- Eventually, you learn to use it only when seriously threatened.
- Retreat a bit to charge it safely.
- If there's no space to retreat, charge it at the right time with sufficient pre-emption.
- Another thing Teleport may throw players off is how Teleport-ing to your new location throws off your touch relative to the ship core.
- This usually requires a quick repositioning of your touch on screen to get comfortable with using the ship again.
- Because it can be hard to pre-empt Teleport, learn Teleport by using it as an escape tool first.
- This also applies to more veteran players, especially against dangerous turrets like spinners and bloomers.
- Never position yourself way too downfield.
- Leave at least about one ship's height worth of space between the bottom edge of the field and your ship core.
- This allows you to quickly retreat a bit and let go, so Teleport can charge quite safely.
- However, be careful when you retreat as there can be times you retreat and die from crashing into bullets.
- The next step is to figure out the new position to go to.
- For a general guide of where to Teleport to, pick a spot where it is not too dense in bullets.
- Don't Teleport in the middle of a shuriken cloud, because you'll quickly get killed by other faster bullets.
- Another tactic is to generally find a spot where there are less variety of bullets, excluding boomerangs .
- Preferably, it should be light clusters of shurikens as well as pellets.
- Teleport-ing to where darts are is dangerous and not recommended unless you can eliminate all of them, or know what you are doing by teleporting between dart lanes.
- If you are trapped with no way to inch left or right (especially in the presence of spinners), charge Teleport knowing you are going to get trapped in between bullet streams.
- Then Teleport to the other side of the field, as downfield as possible, so that you can still dodge between bullet streams.
- If the whole screen is cluttered with bullets, try Teleport-ing as upfield as possible.
- However, make sure there are no bullets from spinners since spinners tend to be slightly more upfield, making bullet lanes too small for dodging.
- Then swipe across the top of the screen, from left to right (or vice versa).
- The swiping action is a distraction for dart turrets to aim at you.
- This allows some time for bullets to cool off from the rest of the field.
- Swipe across, let go, and let Teleport run until the dart turrets start firing, or if any darts are too close for comfort.
- It usually doesn't take long for them to achieve a lock-on, so there is no risk of Teleport cancelling.
- This dart distraction technique is very useful for many offensive Teleport ships as they can launch their offensive Aura immediately after the Teleport.
- The most common technique for Teleport (only if you have Ultimate) is to Teleport right onto MIRVs to completely delete them away.
- Take note that it is VERY difficult but possible to eliminate a laser MIRV
 .
. - The arrival location must be right on top of the laser MIRV before it has any chance to trigger.
- The reason this works with pellet MIRVs is the pellet MIRVs actually usually trigger, but the pellets that released are the ones that are deleted, not the MIRV itself.
- This is why Teleport-ing slightly further away from a pellet MIRV will still have a few pellets released.
- Take note that it is VERY difficult but possible to eliminate a laser MIRV
- When you Teleport to eliminate MIRVs , the best spot to Teleport to is not always the spot with the most number of MIRVs clustered together.
- This is because such a spot can be rather upfield, and have surrounding MIRVs that will explode.
- This causes a total complete mess of pellets flying in all directions, most likely resulting in your death, particularly from MIRVs that come from behind you.
- Instead, find a spot of MIRVs such that:
- There are no MIRVs behind you that can trigger on arrival.
- Teleport-ing to that location will not result in you pushing back down far enough to trigger MIRVs behind you.
- The second priority is to find the spot with the most MIRVs that can be deleted.
- There are no MIRVs
- This is because such a spot can be rather upfield, and have surrounding MIRVs
- The other most common technique of Teleport against MIRVs , particularly from MIRV Bloomers, is to Teleport to a spot near to the frontline of MIRVs to delete a few MIRVs, then push back downfield.
- Repeat again if necessary, but don't over-abuse this technique as Teleport's Charge Time can stack quite fast when doing this.
- You have to dodge between pellets released by MIRVs .
- Ensure the MIRV Bloomer is destroyed as soon as possible.
- Repeat again if necessary, but don't over-abuse this technique as Teleport's Charge Time
- Teleport is also a very useful positional tool for ships that have straight firing main weapons and offensive Auras .
- Such ships utilize Teleport much more often than other ships that simply only use it for defensive purposes.
- The idea is to use Teleport to quickly line yourself up with your next target after the Invader you were aiming at is destroyed.
- For speedrunning, the degree of pre-emption needed depends on the speed of the straight firing main weapon or Aura .
- The slower the means of damage, the more pre-emption needed.
- For offensive radius based Auras , Teleport is also used as a "peek-a-boo!"
- What you want to do is to Teleport upfield, launch your Aura , and then slowly retreat back down.
- For counter based Auras , it is used to blitzkrieg, quickly getting to where you need and firing your Aura immediately after arrival.
- For this case, it becomes a very tactical gameplay, strategically sniping down targets.
- What you want to do is to Teleport upfield, launch your Aura
Reflex EMP

Activates a Bullet EMP when charged
| Upgrade Lvl | Radius | Charge Time | Charge Time Increase | Time to recover 1 charge |
|---|---|---|---|---|
| 1 | 225 | 1.0s | +3.0s | 5s (−0.6s per sec) |
| 2 | 0.9s | +2.75s | 5s (−0.55s per sec) | |
| 3 | 0.8s | +2.5s | 5s (−0.5s per sec) | |
| 4 | 0.7s | +2.25s | 5s (−0.45s per sec) | |
| 5 | 0.6s | +2.0s | 5s (−0.4s per sec) | |
| Ultimate (6) |
| Ultimate | Description | Details |
|---|---|---|
| Damage | Deals damage to all enemies in range. | Deals 20 AoE damage |
Useful Levels: 1, Approximately 3-5, Ultimate
Brief Summary: One of the hardest defensive Zens to use. A versatile defense and offense tool once at Ultimate Level. Slow cooldown means it is difficult to grasp the appropriate interval between use, thus only recommended for pro players. The concept of leaving yourself exposed to incoming fire even for a short while is also not intuitive for lower skilled players.
Upgrades
- A level 1 Reflex EMP is not very useful since a Charge Time of 1s is too long and requires too much pre-emption.
- As the radius of bullet clearing for Reflex EMP is decent, Reflex EMP allows you to hop across quite a fair bit of screen space.
- This can be especially useful when dealing with spinners, as they create lanes of bullets that are too difficult to jump across normally.
- As you upgrade Reflex EMP, the level of pre-emption needed becomes less and less, becoming more and more useful since lesser pre-emption also means retreating less.
- This translates to more bullet clearing since you launch Reflex EMP closer to the midfield.
Strategies
- The game is slowed to a speed of ×0.3 at the point Reflex EMP is fired, which lasts for 0.333s in real-time.
- Because of the significant noticeable Charge Time of Reflex EMP, it is sometimes not intuitive.
- It is easy to think of their bullet clearing options only when threatened and desperate.
- When that happens, the Charge Time of Reflex EMP, even at max level, is too long.
- Thus, it might be a better idea to learn a Zen with a lower Charge Time (which is Teleport ) first before learning Reflex EMP.
- The other thing about Reflex EMP that is difficult to learn is its Time to recover 1 charge
 .
.- The slow Time to recover 1 charge means it is easy to try and use them again before Reflex EMP has completely cooled down.
- It takes 5s for Reflex EMP to cool down.
- To put that in perspective, it's usually once a wave Act 4 and above in community missions
 or once every heavy and/or dense wave in daily missions
  .
. - Sometimes it is possible to use it twice a wave in Act 5 and above, only if the wave is heavy and/or dense.
- The slow Time to recover 1 charge
- The bullet clearing aspect, however, is not the main selling point of Reflex EMP.
- Once you upgrade to Ultimate , Reflex EMP's utility is significantly improved, adding a completely new dimension to using Reflex EMP.
- Reflex EMP is now a pre-emptive tool in clearing out Invaders, before they get the chance to flood the field with bullets and lasers
 .
. - In particular, many waves, Act 4 and above are opened up by Reflex EMP, which means you need to position yourself to use Reflex EMP before Invaders of the next wave come in.
- The huge advantage to Reflex EMP is how quickly it goes off, unlike Mega Bomb .
- In fact, Reflex EMP is a psuedo-Mega Bomb, just with smaller radius and less damage
 .
. - Despite the lower damage and smaller radius , Reflex EMP is still useful to deal respectable AoE damage, especially against denser waves.
- In fact, Reflex EMP is a psuedo-Mega Bomb, just with smaller radius
- Reflex EMP is the most effective solution against Sparrows
 equipped with Caged MIRVs
  , discounting apexes.
- Simply go right into the middle of them and launch Reflex EMP, and POOF, all or almost all the Sparrows are gone and there'll be no pellets from Caged MIRVs to deal with.
- However, reserve Reflex EMP for waves with slightly more Sparrows .
- Do not use it if the wave is too light and not dense enough with Sparrows , since the next wave might require it more, or feature a denser Sparrow crowd.
- Simply go right into the middle of them and launch Reflex EMP, and POOF, all or almost all the Sparrows
- There is a very small chance that Reflex EMP will not be able to eliminate the pellets released by Caged MIRVs , if Reflex EMP is released too early. You can see this is because the bullet clearing portion (the blue expanding circle) is released slightly earlier than the damaging portion (the red expanding circle), so the bullet clearing effect ends just slightly earlier than the damaging effect of Reflex EMP.
- The unfortunate thing about Reflex EMP however, is while it is quick, it is not immediate.
- This means that learning the 0.6s Charge Time of Reflex EMP is very important, since it makes all the difference in missing it completely due to Invaders not being fully on screen yet.
- This, is one of the hardest parts of Reflex EMP to learn, making Reflex EMP a high skill Zen .
- The rough timing for Reflex EMP between Act transitions is slightly after the words fully exit the screen (assuming Sparrows and Ravens coming in first).
- This needs to be adjusted based on the most downfield Invader, since a Vulture front wave takes much longer to fully arrive on screen than a wave with Ravens in front.
- This means that learning the 0.6s Charge Time
- The most optimal Reflex EMP usage is to push yourself all the way slightly above the midfield to reach all upfield Invaders with its relatively small radius .
- While the radius isn't THAT small, it still requires you to push higher upfield to make use of it.
- For a player new to using Ultimate Reflex EMP, start opening up Reflex EMPs at the lower half of the screen, progressively learning its timing and then slowly pushing it up higher and higher.
- While the radius
- Reflex EMP doesn't have any affinity and is only 20 AoE damage .
- Against Shielded Invaders, it may be better to use a bit of your main weapon to strip the shield before Reflex EMP goes into action, so that more effective damage can be dealt.
- Against Shielded
- Even if the field has no Ravens , pull off Reflex EMP each wave in Act 4.
- There is no reason not to with a wave with only larger Invaders (Herons and above) because there is a lot of time for Reflex EMP to cool down in heavier waves.
- This doesn't mean you should use Reflex EMP twice that wave.
- There is no reason not to with a wave with only larger Invaders (Herons
- For Acts 1 - 2, Reflex EMP can be used only once, usually in the first wave of the Act.
- For Act 3, you may be able to use Reflex EMP twice, especially if there's a heavier and/or dense wave in 3-4.
- From Act 4 onwards, once per wave.
- There are times in Act 5 where twice a wave might be possible.
- The important thing is not to allow Reflex EMP to have a significantly long Charge Time of approximately above 1s.
- There are rare times, however, where chaining Reflex EMP almost immediately after one another is optimal.
- An example might be to open up wave 4 of a certain Act with Reflex EMP, clearing that wave quickly, but wave 1 of the next Act is also optimal for another Reflex EMP to go off.
- Because Reflex EMP clears off wave 4 of that Act quickly, there shouldn't be much bullets to contend with. Do a quick delay by drawing a quick small circle and leaving Reflex EMP to slowly charge during the Act transition.
- When the first wave of the next Act arrives, BOOM, Reflex EMP goes off nicely.
- In Act 5, this can mean that using Reflex EMP twice in a row in such circumstances still allow for Reflex EMP to go off comfortably in wave 2 of Act 5.
- In a pure Sparrow wave, Reflex EMP does wonders to eliminate all those pesky dart streamer Sparrows or Sparrows with lasers equipped.
- For some ships, the optimization of Reflex EMP is less stressful, since you can position yourself at that spot earlier and waste less DPS from your main weapon .
- For other ships with slow travelling main weapon projectiles however, optimization is more difficult. You have to throw yourself into that position, meaning letting go of touch and literally flick with your finger/stylus to that spot to let Reflex EMP charge while moving.
- While using Reflex EMP for damage becomes the primary purpose of Reflex EMP when Ultimate , don't be afraid to use Reflex EMP for defence. Survival is always more important than going for the offense.
- One of the most advanced speedrunning techniques of using Reflex EMP for speedrunning is with regards to MIRV Bloomers.
- Since MIRVs need 0.5s before they can be triggered, you can time Reflex EMP such that pellets from MIRV Bloomers are just released, but they do not reach you before Reflex EMP is released, saving you from dying.
- Such a technique allows you to quickly refill Aura due to a lot of grazing from these pellets released by MIRVs .
- Since Reflex EMP takes 0.6s to go off, and MIRVs take 0.5s before they can be triggered, taking into account a small delay between the time Reflex EMP starts charging and when touch is released, charge Reflex EMP just slightly before the MIRV Bloomers are fired. Here's how the result would look like when pulled off correctly:
- Since MIRVs
- The same could be done for laser MIRVs , such that one does not need to deal with the laser lines from exploded laser MIRVs. However, doing so for laser MIRVs is more for survival rather than speedrunning since this prevents you from grazing the lasers fired off laser MIRVs.
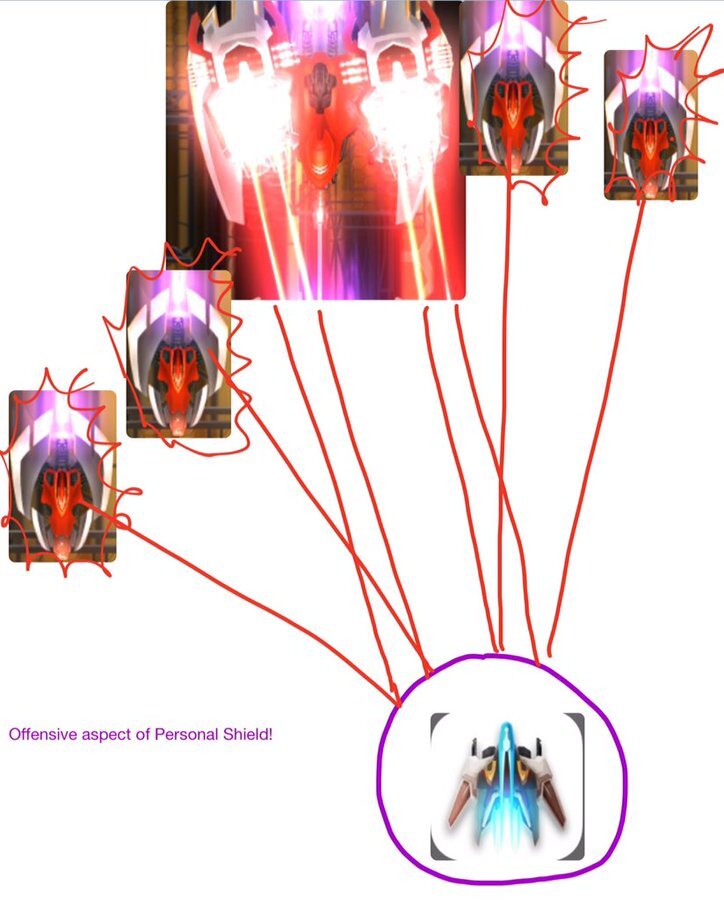
Personal Shield

Protects your ship with a small shield
| Upgrade Lvl | Max Duration | Charge Time | Charge Time Increase | Time to recover 1 charge |
|---|---|---|---|---|
| 1 | 2.5s | 0.6s | +3.0s | 6s (−0.5s per second) |
| 2 | 2.75s | 0.55s | +2.75s | 6s (−0.458s per second) |
| 3 | 3.0s | 0.5s | +2.5s | 6s (−0.417s per second) |
| 4 | 3.25s | 0.45s | +2.25s | 6s (−0.375s per second) |
| 5 | 3.5s | 0.4s | +2.0s | 6s (−0.333s per second) |
| Ultimate (6) |
| Ultimate | Description | Details |
|---|---|---|
| Laser Reflection | Reflects lasers back at enemies. | Adds Laser Reflection |
Trivia: The below drawing done by veteran player Lie_algebra was a suggestion when Ultimate Level uprgades were not yet implemented. The devs picked up on this drawing and implemented this laser reflection behaviour as the Ultimate Level upgrade for Personal Shield. Pretty cool!
Useful Levels: 1, Ultimate
Brief Summary: Difficult to use Zen. Generally underpowered but has its niche uses, making it shine above most other Zens. The long Time to recover 1 charge means this Zen is not easy to use for beginners.
- Personal Shield has a radius of 50.
- The utility of Personal Shield is underrated.
- It's easy to think Personal Shield as nothing more than reflecting lasers to deal damage back to Invaders, or to defend against lasers.
- However, Personal Shield can also be used against bullets.
- While the bullet clearing capability isn't much, it is very useful in dire situations when trapped.
- It's easy to think Personal Shield as nothing more than reflecting lasers
- Personal Shield has a very tiny Fade Out time of 0.2s.
- This does not seem like much, but think of it like Chrono Field's
 Phase Out
  time.
time. - The Fade Out time of Personal Shield is able to cut your way through a thin wall of bullets, like shuriken clouds or pellets (whether lanes or just annoying random pellets).
- It is important to practice Personal Shield Fade Out to maximize the bullet clear it can provide.
- Generally, Personal Shield Fade Out can help you cut through about one-eighth of the screen width.
- Use the Fade Out time to help you cut through walls and position yourself in a better spot for offence or to escape death.
- Personal Shield Fade Out is also useful at dealing against pellets released by Caged MIRVs .
- You can deploy Personal Shield for a split second to push your way past the mess of pellets.
- Just be careful not to use it when the next wave has enough lasers you can reflect.
- This does not seem like much, but think of it like Chrono Field's
- While Personal Shield is active, gameplay speed is reduced by 25%.
- This means while the Max Duration
 of Personal Shield is shown as 3.5s, the actual duration in real time is 4.67s (3.5 ÷ 0.75), as the 3.5s refer to the in-game time.
 - The rather long duration of Personal Shield allows you to have time to decide how long to continue staying shielded to block off more bullets, especially those from weird directions that are inconsistent with the rest of the bullets.
- However, plan your escape quickly as 4.67s will not feel like a long time.
- Quickly use the Fade Out when the opportunity hits.
- This means while the Max Duration
- There is not much purpose for an increased duration of Personal Shield.
- You would seldom use the full duration of Personal Shield since it is only used to either cut through bullets, or to reflect lasers .
- Neither of which purpose are needed for the full duration since laser bursts only last 1s (or 2s if accounting for some de-synchronization), while cutting through bullets don't require more than probably 0.25s.
- The longer duration helps nevertheless, particularly against MIRVs which feature a sudden speed-up in bullets you want to block, since MIRVs move slowly. You would want to get rid of the MIRV cluster before being safe to exit.
- You would seldom use the full duration of Personal Shield since it is only used to either cut through bullets, or to reflect lasers
- Another useful function is to block off more than one barrage of Invader weaponry.
- Particularly, against both lasers and boomerangs which usually come in separate bursts.
- As a completely invincible shield, Personal Shield is one of the best tools against boomerangs since it can last through the entire burst of boomerangs.
- Just don't attempt to sit inside Personal Shield for 2 bursts of boomerangs , because it's not long enough.
- Particularly, against both lasers
- As a last minute defence, Personal Shield works very well since it's quick to charge.
- But like Teleport , it is not instant, so don't do it at the very last minute when a bullet is too near you.
- The upgrades in level slightly decrease the level of pre-emption, but it's not anything significant.
- But like Teleport
- Personal Shield works well with Uninterruptible Burst main weapons , and Laser Storm .
- Both continues to deal damage, making your exit slightly safer from the destruction of some Invaders or turrets.
- Because of the Very Slow Time to recover 1 charge of Personal Shield, it is usually not used in light waves.
- Personal Shield usually sees usage once every heavy and/or dense wave.
- In very heavy waves, or dense and heavy waves, you may be able to use Personal Shield twice.
- Upgraded to the Ultimate level, it is pretty self explanatory how to use it.
- Simply use it to block off lasers when lasers are present.
- However, it is not always beneficial to block off lasers if the laser density is sparse.
- Generally, if there are still more than 6 lasers that are going to be fired in one burst, Personal Shield will benefit.
- If not, dodge the lasers and use your main weapon or Aura to deal more damage and kill Invaders off faster.
- Unless you are cornered with no other means of escape, so Personal Shield can get you out of the tight situation.
- Only use this as a last resort.
- As an extra note, a non-Ultimate Level Personal Shield is not useless against lasers .
- In fact, Personal Shield is pretty much the only reliable tool against lasers if your Aura can't get you out of laser fire.
- In fact, Personal Shield is pretty much the only reliable tool against lasers if your Aura
- Simply use it to block off lasers
- Personal Shield can also effectively block off Doomsday Lasers
 .
.- Take note that normal or speed lasers will fire first before Doomsday Lasers do.
- However, the duration of an Ultimate Personal Shield is long enough to last through both the initial burst of normal lasers and the Doomsday Laser .
- If the entire Personal Shield isn't within the Doomsday Laser , it is possible to use the Fade Out time to jump away from the Doomsday Laser if you think it won't last.
- Take note that normal or speed lasers
- The best usage of Personal Shield is against laser MIRVs .
- Since you should mass activate laser MIRVs , you can simply throw yourself inside a field of exploding laser MIRVs to deploy Personal Shield and take down Invaders very quickly.
- In advanced speedrunning, it is even possible to sit between 2 laser MIRV Bloomers so that all the laser MIRVs will mass activate at exactly the same time (after 0.5s of being fired).
- For Vultures , if the laser MIRV Bloomers are at the leftmost and rightmost of the Vulture, this is not so risky since you can be right on top of the Vulture's cockpit to trigger simultaneous mass activation.
- However, in the case of a Condor or Roc where the 2 most center difficult to reach turrets are laser MIRV Bloomers, it is possible to find a safe spot such that the laser MIRVs will zip past your core such that the laser MIRVs themselves don't kill you. This is illustrated below:
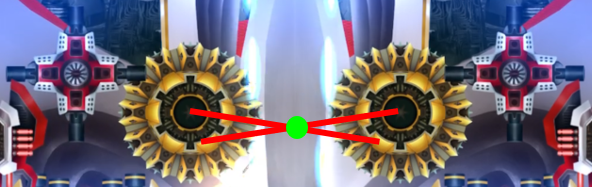
- The reason for going so up close and personal to laser MIRV Bloomers is for even more laser MIRVs to activate, making the laser reflection damage even stronger.
- In the case of 2 T4 laser MIRV Bloomers, a bit of Shield Breaker
 main weapon and the laser MIRV activation of all 40 T2 laser MIRVs can fully wipe out a Shielded Roc .
- For Vultures
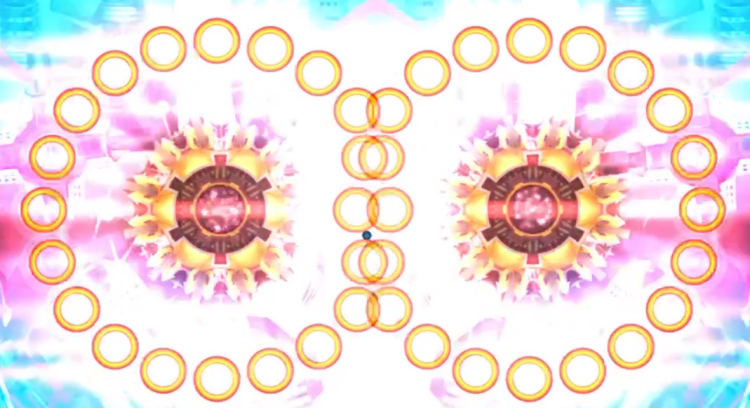
- An even more advanced technique for speedrunning which rides upon the simultaneous mass activation of all laser MIRVs is the capability to graze off the laser lines of these laser MIRVs before reflecting them.
- Take note that this requires a LOT of practice.
- The moment where a graze is recognized is when the white pulse of a laser coming from a laser MIRV zips past your ship's core.
- With impeccable timing, you can deploy Personal Shield such that the game recognizes you have grazed the white pulses from laser MIRVs , but you do not die from the activated lasers .
- It takes 1s from the time laser MIRVs are triggered to the time the white pulses starts to be emitted from the laser MIRVs' detonation point, 0.6s (assuming fully cooled down) to deploy Personal Shield after releasing touch, and about 0.25s between the time the white pulses starts to emit from the laser MIRVs' detonation point to the point the lasers become active and can kill you.
- This means you have to start charging Personal Shield between 0.5 - 0.65s after seeing the white lines of laser MIRVs appear to graze the white pulses, since you need to take into account the tiny but non-negligible travel time from the point the white pulses are emitted from the laser MIRVs' detonation point to your ship core.
- This is an extremely tight timing which is very difficult to pull off. In fact, this is even more difficult than pulling off a Super Reflect which has a buffer of 0.5s.
- This means you have to start charging Personal Shield between 0.5 - 0.65s after seeing the white lines of laser MIRVs
- To practice this skill, mass activate all laser MIRVs of a low tier laser MIRV Bloomer and find a safe spot to hide at before activating Personal Shield.
- Try to use your radius based Aura so it is easier to determine if you succeeded or not.
- You may also use a counter based Aura but try to drain it such that there are at least 2 empty counters to fill.
- Try to use your radius
- Since you should mass activate laser MIRVs
Focus Lance

Charges a piercing Lance
| Upgrade Lvl | Damage | Charge Time | Charge Time Increase | Time to recover 1 charge |
|---|---|---|---|---|
| 1 | 39.6 | 0.95s | +1.8s | 4s (−0.45s per second) |
| 2 | 0.8s | +1.6s | 4s (−0.4s per second) | |
| 3 | 0.65s | +1.4s | 4s (−0.35s per second) | |
| 4 | 0.5s | +1.2s | 4s (−0.3s per second) | |
| 5 | 0.35s | +1.0s | 4s (−0.25s per second) | |
| Ultimate (6) |
| Ultimate | Description | Details |
|---|---|---|
| Damage Type = Armor Piercing | Pierces enemy armor. | Makes Focus Lance always deal the full 39.6 damage to Armored |
Useful Levels: 4 and above
Brief Summary: The Zen version of Vorpal Lance
Upgrades
- A level 1 Focus Lance is pretty much useless due to how sluggish it is
- This requires you to pre-charge so early it is ridiculous to estimate, especially with bullets left over from the previous wave.
- It is also ridiculous to predict the RNG movement of Invaders with such a long Charge Time .
- As you upgrade Focus Lance, it becomes more responsive and abusable.
Strategies
- Focus Lance has the following stats:
- Initial Speed = 1000
- Acceleration = 1000
- Time slows to a speed of ×0.3 for a real time of 0.333s when fired
- Spawns at a vertical distance of 30 above ship core
- Hit Circle Radius = 15
- Given the speed of Focus Lance and taking into account the time you need to stay still to charge it, you can only hope and pray that Focus Lance hits as many Ravens and Sparrows as possible.
- Given their rapid RNG movement, it is unpredictable since they can move away just as Focus Lance is fired.
- The fact that Focus Lance needs to cool down is another factor that makes Focus Lance difficult to wield properly.
- By the time Focus Lance has cooled down, while not long, it is enough time for the field to be flooded with fast moving bullets such as boomerangs and darts.
- This makes it difficult to reposition yourself at a new spot where using Focus Lance might be viable.
- It's Aura counterpart, Vorpal Lance , allows multiple piercing lances to be fired at once, clearing the field of Invaders quickly enough so less bullets would be stacked upon you, and not running into positioning problems later to fire more lances. On the other hand, Focus Lance does not clear bullets, even at Ultimate Level.
- By the time Focus Lance has cooled down, while not long, it is enough time for the field to be flooded with fast moving bullets such as boomerangs
- Thus, Focus Lance can be seen as a one-time lance at the start of a wave.
- After that, Focus Lance is only used to pop turrets off Invaders, and a bonus if it can hit Ravens and Sparrows .
- Focus Lance can generally be used about twice a wave from Act 5 onwards, discounting light waves where it is only once.
- On some heavier waves in Act 4, you may be able to use it twice.
Clover ATS

Charges a volley of homing missiles.
| Upgrade Lvl | Damage | Charge Time | Charge Time Increase | Time to recover 1 charge |
|---|---|---|---|---|
| 1 | 4 missiles × 18 damage each | 0.9s | +2.5s | 5s (−0.5s per second) |
| 2 | 0.85s | |||
| 3 | 0.8s | |||
| 4 | 0.75s | |||
| 5 | 0.7s | |||
| Ultimate (6) |
| Ultimate | Description | Details |
|---|---|---|
| Turret Seeker | Clover ATS targets active turrets. | Makes the missiles of Clover ATS seek out active turrets like X-81. |
Useful Levels: 4 and above
Brief Summary: The Zen version of Missile Swarm. Mostly used at the start of every wave, although can also be used at the midpoint of heavier waves. Fairly abusable, especially when complemented with a defensive Aura. Primarily designed as a quick offensive ability that can be used occasionally.
Strategies
- Clover ATS has the following stats:
- Initial Speed = 400
- Initial Acceleration = −1200
- Minimum Speed = 10
- After 0.15s, Acceleration = 1800
- Maximum Speed = 800
- Missile Lifespan = 1.7s, after which, they disappear without dealing damage
- Maximum Turning Rate = 400
- Hit Circle Radius = 3
- When fired, time slows to a speed of ×0.3 for a real time of 0.333s
- Straightforward offensive Zen to use.
- Primarily, you won't go wrong if you activate Clover ATS whenever fully recovered.
- Just don't use it at the end of a wave as wasting any of the 4 missiles means wasting at least 18 damage .
- Always charge Clover ATS as downfield as possible.
- Swipe back to the bottom to activate Clover ATS because of the missile tracking for Clover ATS is not as good as Missile Swarm .
- Swipe back to the bottom to activate Clover ATS because of the missile tracking for Clover ATS is not as good as Missile Swarm
- Don't use Clover ATS against Sparrows from Act 2 onwards because you will waste most of the damage on overkill.
- The only real speedrunning tactic with Clover ATS is to strip Invader shields of Herons or larger before letting Clover ATS go into action (unless you have the Clover ATS Shield Breaker apex).
- There are usually way too many Ravens and it's hard to control your Shield Breaker main weapon to strip the shield but not significantly damage them to the point you rather just kill the Raven(s) with your main weapon.
- As it is difficult to control where Clover ATS missiles would go, you can only hope and pray.
- Clover ATS tends to aim Invaders on the left and right sides of the field rather than the middle due to the way they are fired, so sweep your Shield Breaker main weapon from left to right where possible before firing Clover ATS.
- There are usually way too many Ravens
- The only other thing when speedrunning with Clover ATS is to fire it as frequently as possible without incurring overkill damage (especially at the end of a wave).
- Use it at the start of a wave where possible, eliminating any frontline Sparrows first.
- Use it at the start of a wave where possible, eliminating any frontline Sparrows
- Unlike Missile Swarm , it is very difficult to do Missile Barreling for Clover ATS missiles.
- You can potentially bypass armor damage reduction by charging Clover ATS at the cockpit.
- However, the non zero Charge Time means not a 100% guarantee you can have all 4 missiles of Clover ATS go off before your ship core is not aligned to the cockpit.
Trivia: The ATS in Clover ATS stands for Anti Turret System.
Tracking Minigun

Activates Tracking Minigun when charged

| Upgrade Lvl | Target Tracking | Damage | Duration | Charge Time | Charge Time Increase | Time to recover 1 charge |
|---|---|---|---|---|---|---|
| 1 | Fast (Rotation Speed = 70) | 168 | 4.0s | 1s | +2.5s | 4s (−0.625s per second) |
| 2 | 175 | 4.5s | +2.3s | 4s (−0.575s per second) | ||
| 3 | 185 | 5s | +2.1s | 4s (−0.525s per second) | ||
| 4 | 193 | 5.5s | +1.9s | 4s (−0.475s per second) | ||
| 5 | 204 | 6s | +1.7s | 4s (−0.425s per second) | ||
| Ultimate (6) | 210 |
| Ultimate | Description | Details |
|---|---|---|
| Barrage Missiles | Adds Homing missiles. | Adds Barrage Missiles |
Specific recommended usage of the Tracking Minigun will be mentioned under Corsair itself, since Tracking Minigun is unique to Corsair.
The bullets of Tracking Minigun have a hit circle radius of 2 and are fired in a cone range of −2.5° to 2.5°.
The Barrage Missiles ![]() have:
have:
- Initial Speed = 500
- Acceleration = 300
- Maximum Speed = 900
- Hit Circle Radius = 4
- Maximum Turning Rate = 650
- Maximum Lifespan = 2s
- Fire Rate = Every 0.3s
Useful Levels: 1
Brief Summary: Tracking Minigun is the most unique Zen that takes a long time to dispose of its damage. The cooldown only starts after Tracking Minigun stops.
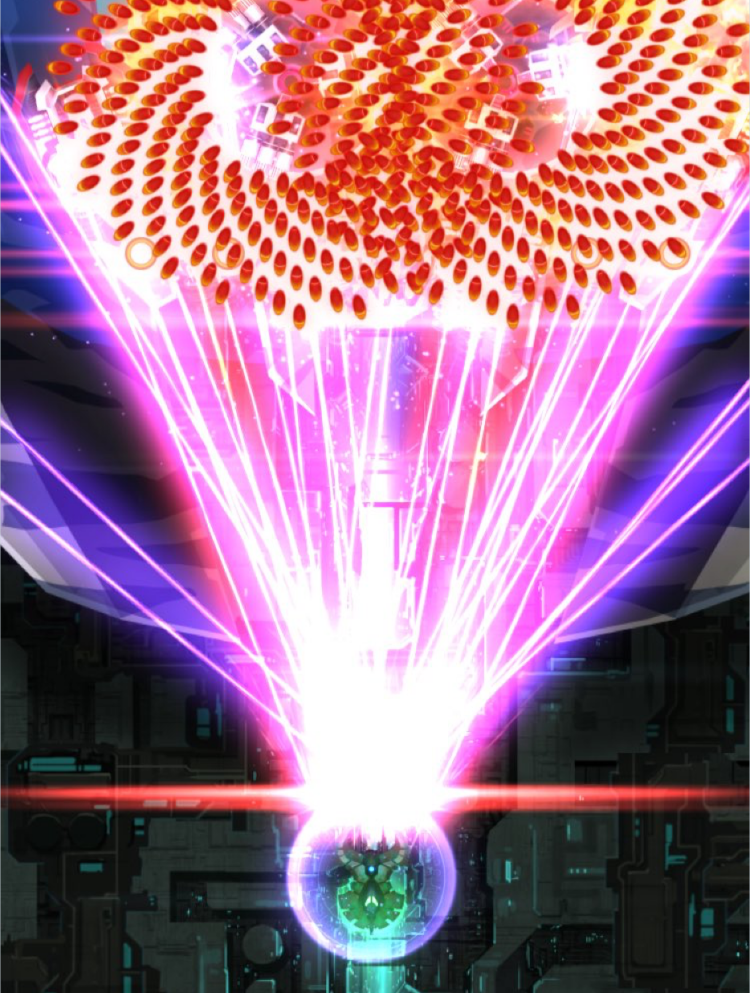
Nightfury

Charges the epic Nightfury laser
| Upgrade Lvl | Damage | Capacity | Charge Time | Charge Time Increase | Time to recover 1 charge |
|---|---|---|---|---|---|
| 1 | 200 | 900ms | 2.3s | +0.8s | 10s (−0.08s per second) |
| 2 | 225 | ||||
| 3 | 250 | ||||
| 4 | 275 | ||||
| 5 | 300 | ||||
| Ultimate (6) |
| Ultimate | Description | Details |
|---|---|---|
| Bullet Destruction | Destroys enemy bullets in its path. | Finally allows Nightfury to clear bullets. (A non-Ultimate Level Nightfury does not clear bullets.) |
Specific recommended usage of the Nightfury will be mentioned under Mirage itself, since Nightfury is unique to Mirage.
Useful Levels: 1, Ultimate
Brief Summary: The bigger brother of Mega Laser. Packs a serious punch, decimating frontline Vultures
Trivia: As of the v5.0.3 update, the Nightfury is able to beamfight Doomsday Lasers. However, this is highly impractical since damage from the Nightfury is neutralized by a Doomsday Laser. The duration of a Doomsday Laser is much longer than that of the Nightfury. Here's an awesome capture of this in action:
